Hello, this semester I am taking Communications 300: Digital Imaging. This week, we were asked to demonstrate our knowledge on the different types of lenses that we can shoot with. Below is listed four different types of lenses, plus something that I hope to learn from this class. I hope you enjoy it and feel free to check out some of my other blogs.
Wide Aperture
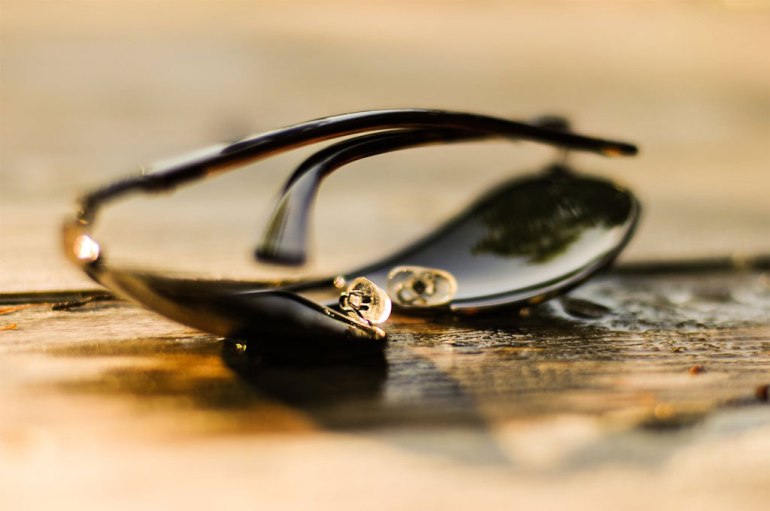
This picture shows a great example of a wide aperture. A wide aperture lens is when a photo is taken very close of an object and the background is blurred. I really like this photo because it shows a different perspective of than I’ve ever seen. You can also see part of the detail of the table that is is on.
Narrow Aperture
I chose this picture because it is a great example of a narrow aperture. A narrow aperture is when everything is in focus. The lens lets in very little light so that you can see every little detail. It also makes it possible for the lens to capture the amazing colors that you see in the photo. I also chose this picture because it is a very beautiful picture of a sunset.
Fast Shutter Speed
A slow shutter speed is when the camera can focus on the subject but blur the background. It is different than a wide aperture lens because it involves motion. I’ve taken a photo similar to this of a friend who also likes to longboard. I’ve learned that the best way to take photos like these is to follow your subject while they move so they stay in focus. These photos are fun to take during a sports game.
Slow Shutter Speed
A slow shutter speed is different than a fast shutter speed because it blurs the subject and focuses on the background. This happens because the shutter will take longer to shoot so the subjects become blurry as they move. Most of the photos that I’ve seen taken this way are with water droplets and nature.
I chose this photo because I hope to be able to become better at taking photos like these. I can’t quite get my settings right to focus more on the subject and blur the background as well as this photo shows. I love the details displayed in this photo and the photographer’s choice of making it black and white instead of its original color. I also admire the way the background is bright in the middle and then fades into black. I don’t know if it is edited that way, but I would like to also learn how to edit my photos better.


Hey Kate! I think all of the pictures you chose were really great representations of each topic. I thought you also had a pretty good understanding of what each topic was about. I like that you also included what you wanted to learn! Great Job!
LikeLike